
snappyHexMesh is the goto mesh generator for OpenFOAM simulations because it is distributed together with the OpenFOAM software package.
While snappyHexMesh is a very powerful tool which can be used to create hex-dominant polyhedral meshes, it uses a text-based input for mesh settings and there are too many settings in that input file!
This makes several users stay away from snappyHexMesh and rely on GUI based commercial software like Pointwise or Hypermesh or open source alternatives such as Salome or Gmsh.
Please don’t get me wrong! The commercial meshers such as Pointwise are extremely powerful and very reliable. However, they come with a large license cost which may render a lot of SMEs and startups out of the equation. And the number of users is also limited by license costs.
Therefore, snappyHexMesh is still a shinny choice if you are on a tight budget or you want to work on multiple CFD projects simultaneously or if you are a PhD student and your professor decides to rely on open source solutions. We will demonstrate you how to generate high quality meshes on complex geometries using snappyHexMesh.
3 Steps of snappyHexMesh
Before talking about how to optimize your snappyHexMesh settings, we need to make sure that we are on the same page. snappyHexMesh uses 3 steps to generate the mesh:
- Castellated mesh generation
- Snapping
- Layer addition
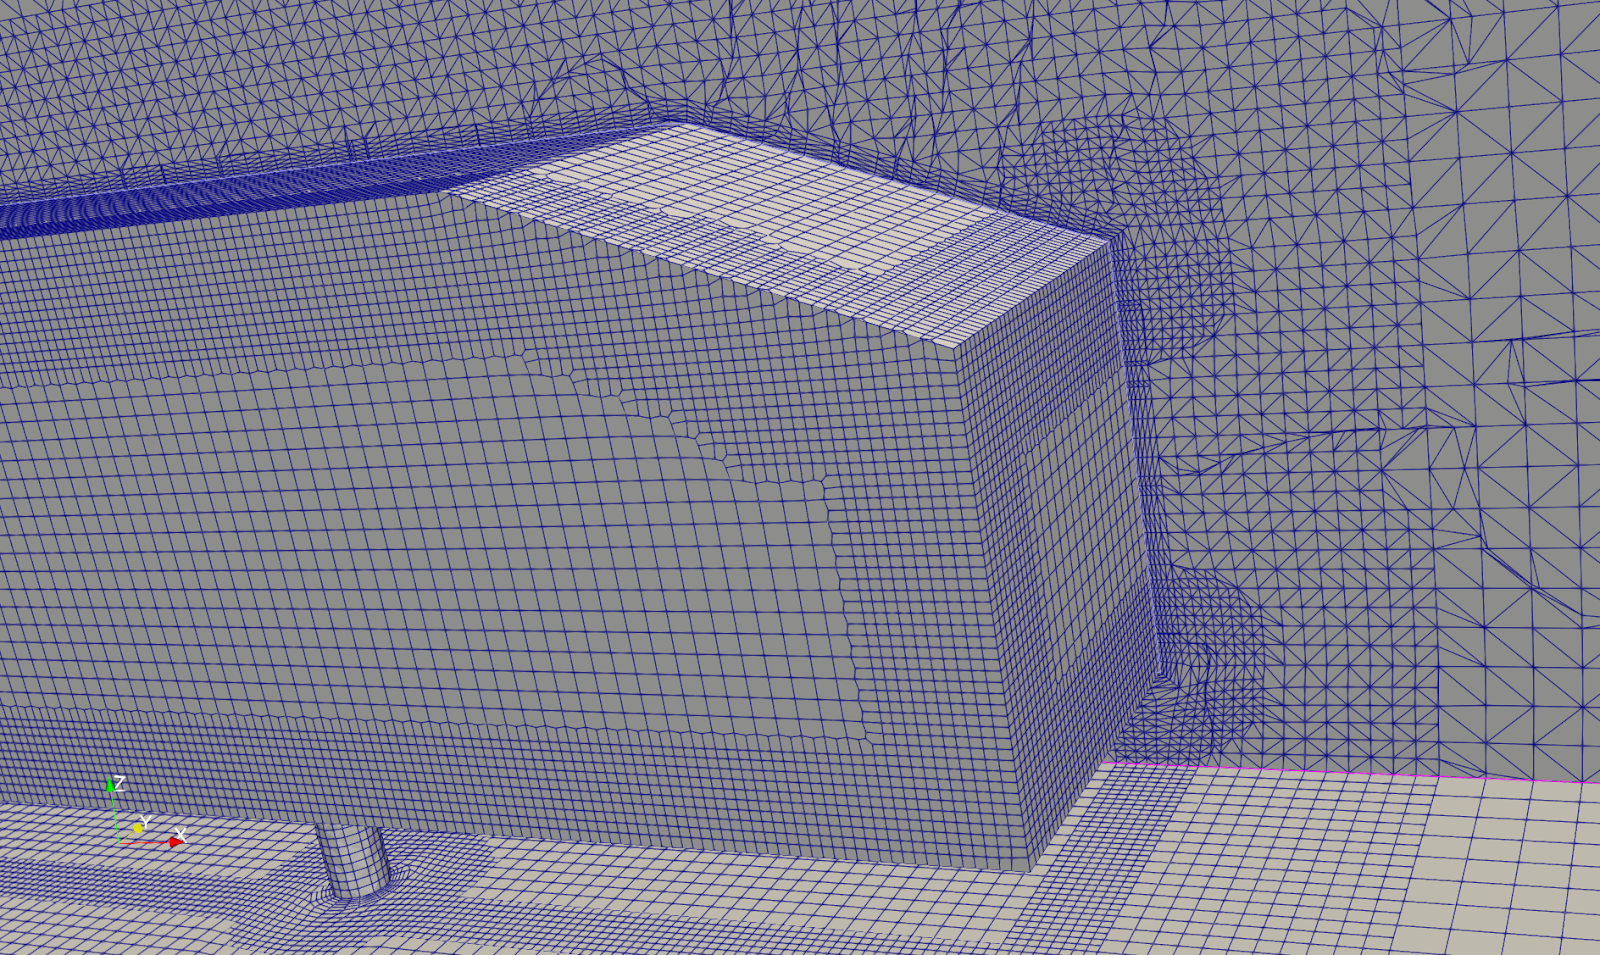
1. Castellated mesh generation: snappyHexMesh uses the background mesh and STL surface mesh to create the shape of complex geometries. Firstly, the background mesh touching the STL is divided into smaller cells and the general shape of the STL is created. Then the cells inside/outside the STL are removed to create the walls. This step is call castellated mesh generation and you can control cell refinement levels here.
2. Snapping: The castellated mesh is a very rough hexahedral mesh. To make the shape of the geometry smooth, the cells are snapped towards the STL surface. This step is snapping and several smoothing iterations are done here.
3. Layer addition: In order to solve the near wall boundary layer properly, boundary layer mesh is added to the snapped mesh. Generally speaking, the cells closest to the wall are moved away from the wall and boundary layer cells are added. We have several tricks to generate a nice boundary layer mesh.
Tip 0 Do not use -overwrite option
SnappyHexMesh generates mesh for each of these three steps and writes the output for each step. All of these steps are very time consuming and you may not want to run all of these steps every time. For example, your castellation step and layer addition step are fine while the layer addition causes the problem. You can restart from any step if you have the mesh from the previous step. If you turn on -overwrite flag, the intermediate steps are overwritten and you cannot reuse these. Therefore, while you are optimizing your snappyHexMeshDict, you may turn off -overwrite step and run each step separately.
Tip 1 Optimize your blockMesh


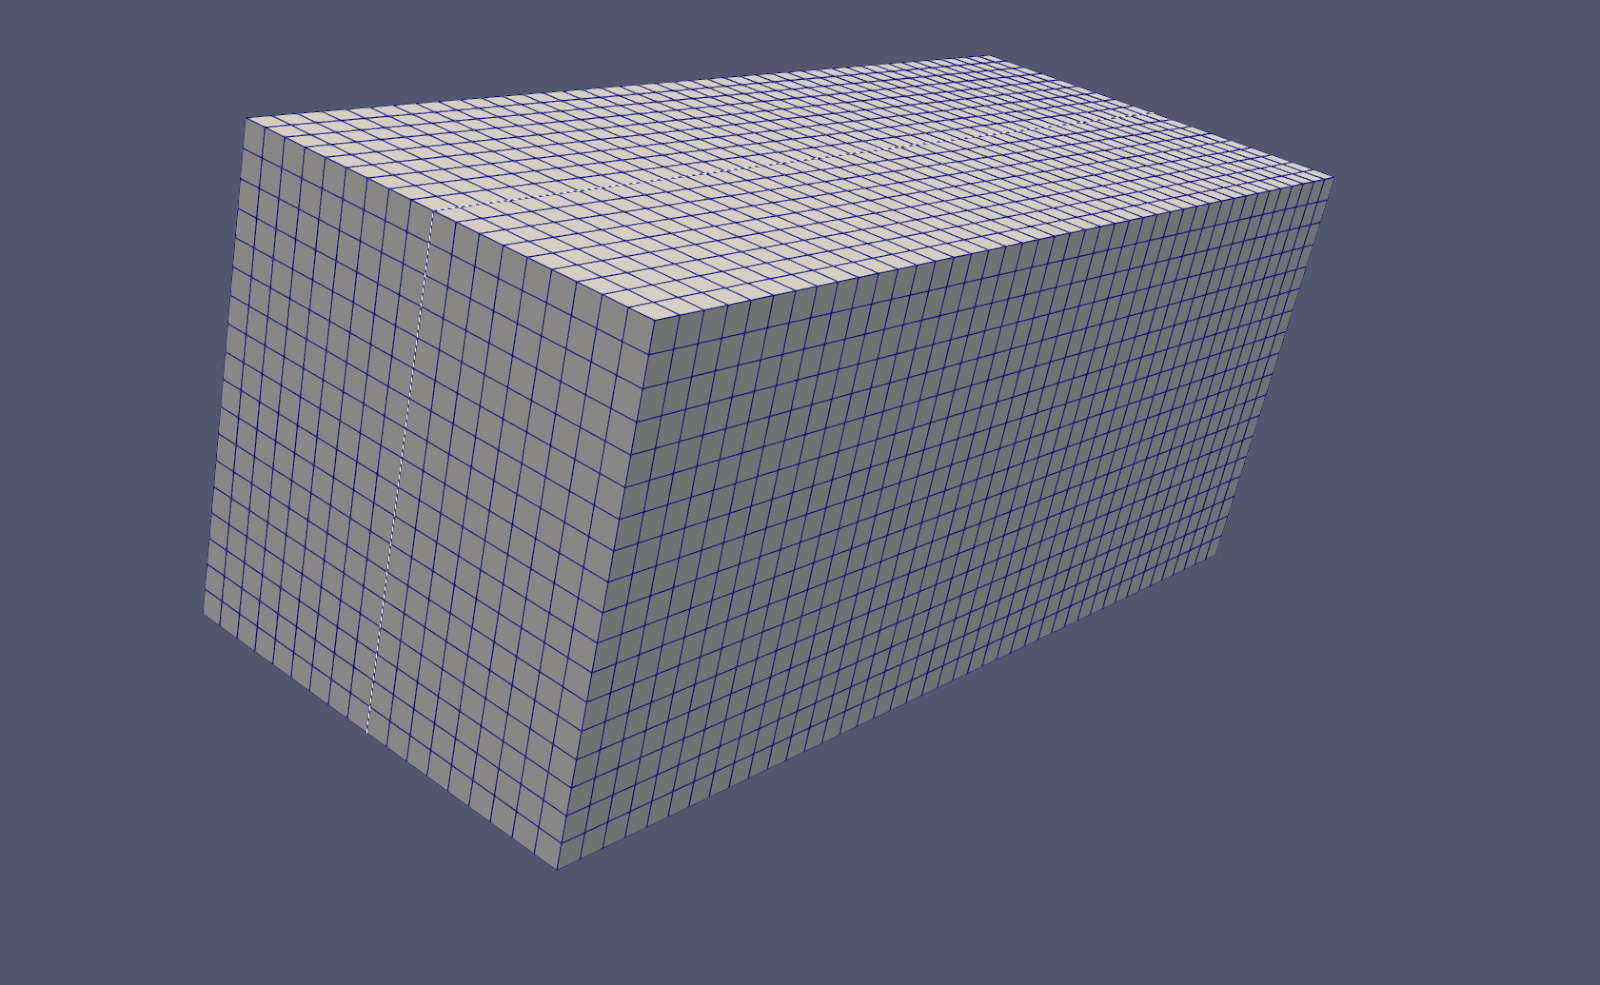

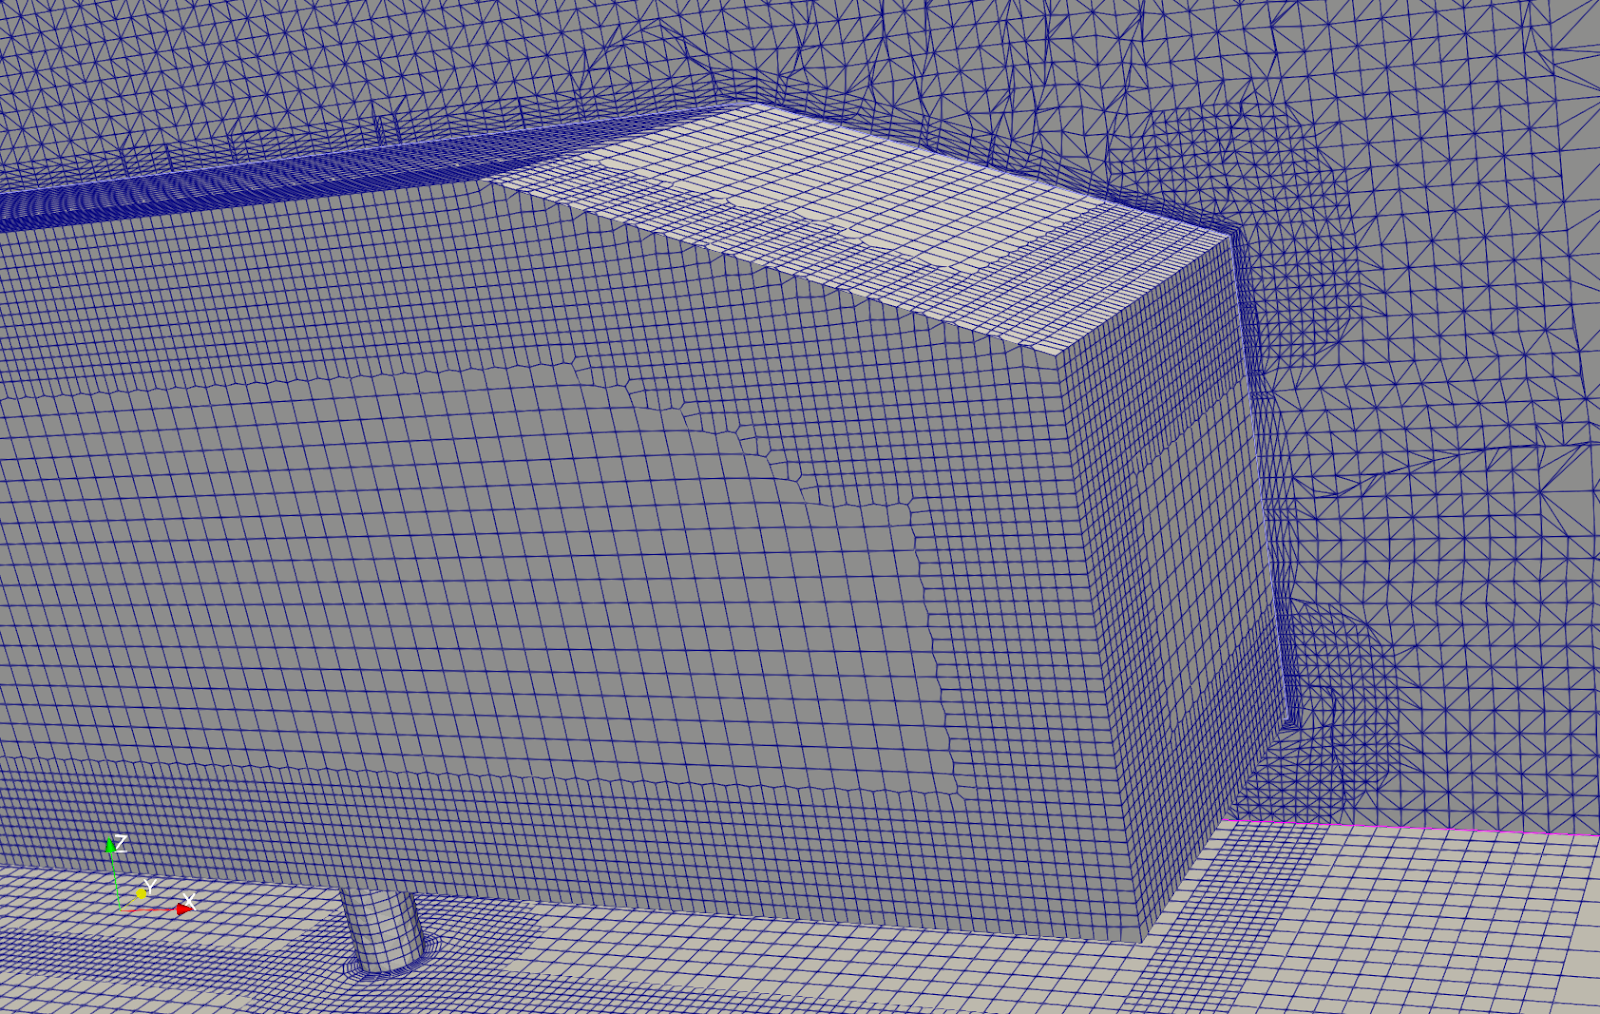
I have a decade of experience dealing with the pain and problems of snappyHexMesh, namely skewFaces. And most of the time, blockMesh is the problem. For the beginners, blockMesh is used to generate background mesh to be used by snappyHexMesh. Most of the time, it is better to have a blockMesh with almost cubic elements (dx=dy=dz), especially near your complex geometry. If your element size in each direction is vastly different i.e. large aspect ratios,, your snappyHexMesh will likely contain skewFaces and checkMesh will complain about these.
Tip 2 Refine your STL surface
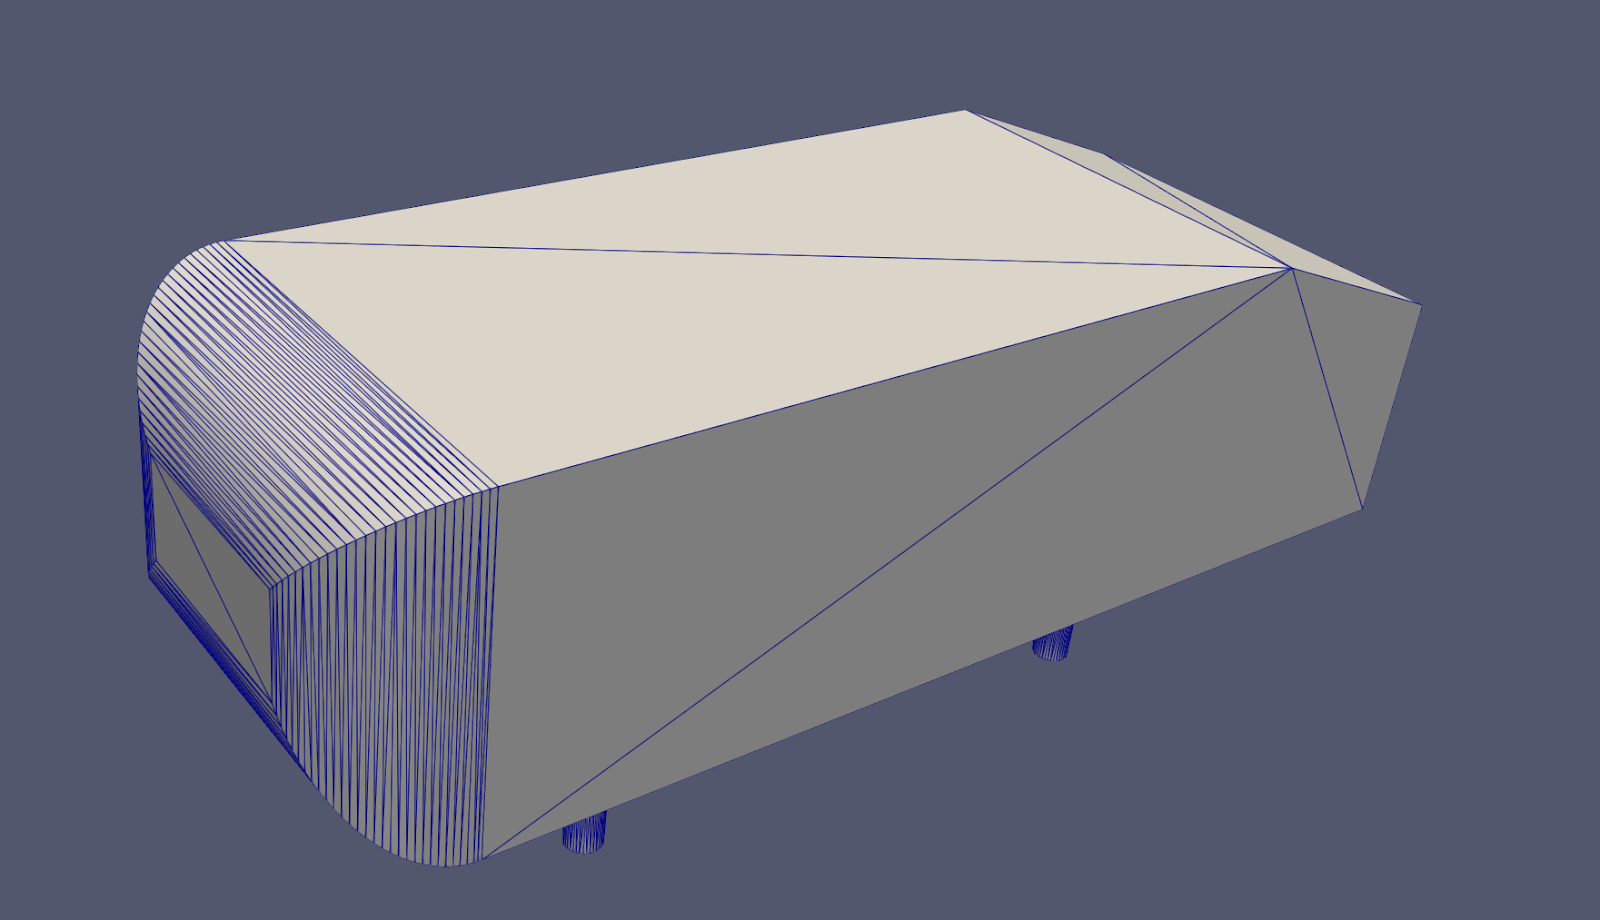
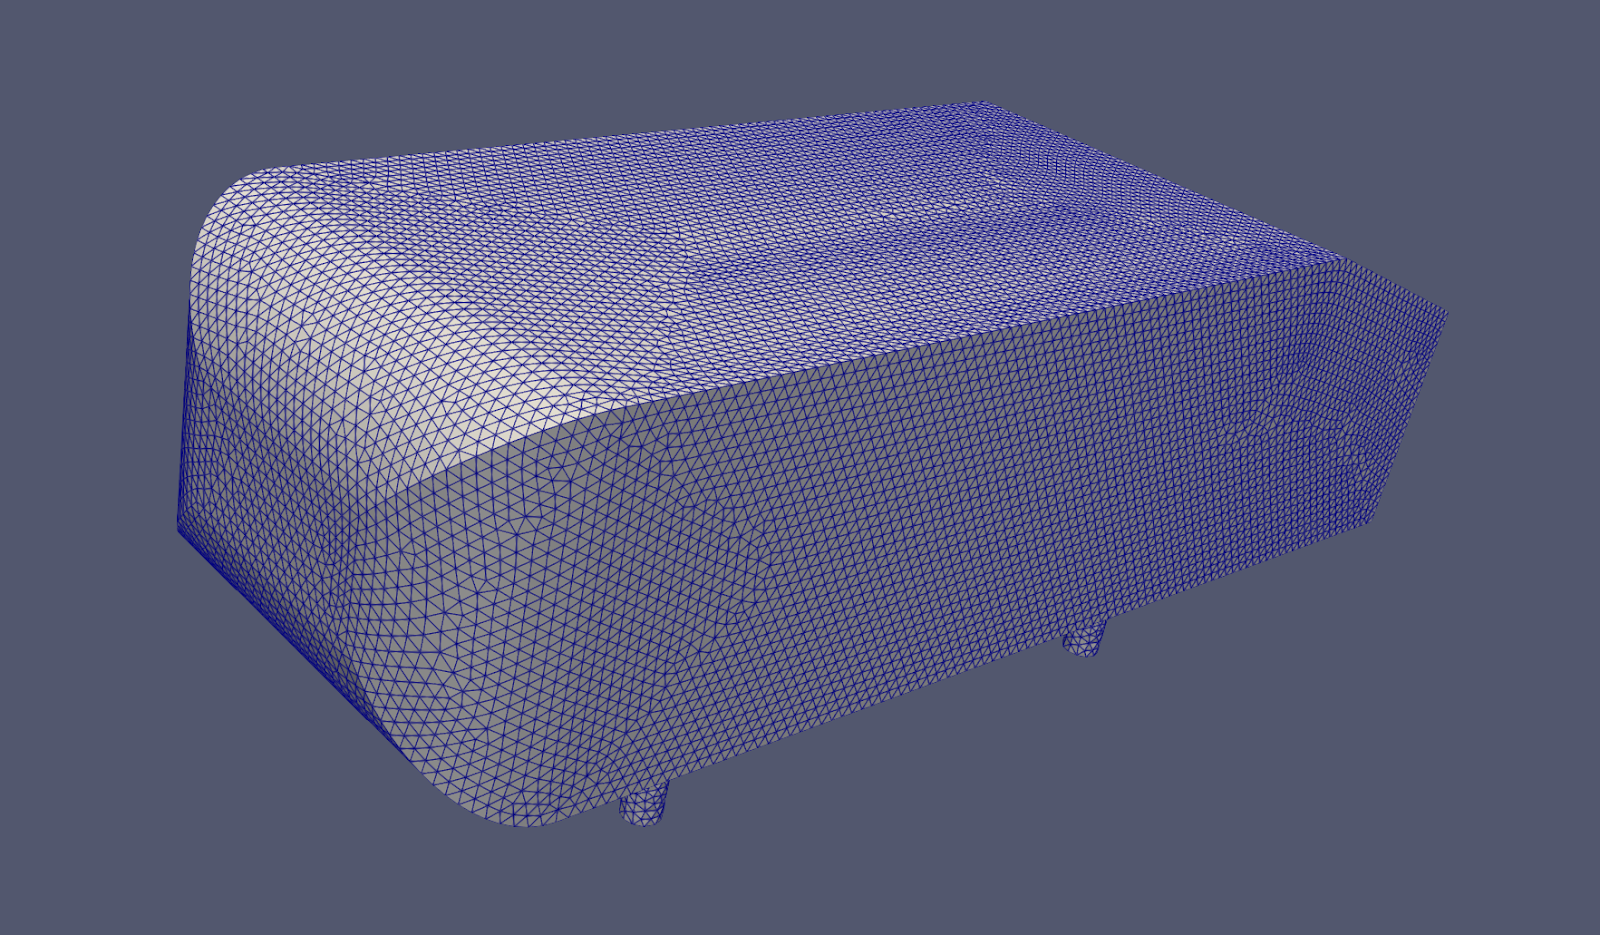
If you created geometry in FreeCAD, Gmsh or Salome and export as STL directly, your STL is likely to have very coarse faces and sometimes your whole geometry may be coarse. snappyHexMesh doesn’t like it and youay have a poor quality mesh. So, refine this STL in Gmsh or Salome and export it to STL. It helps a lot!
Tip 3 Refine feature edges
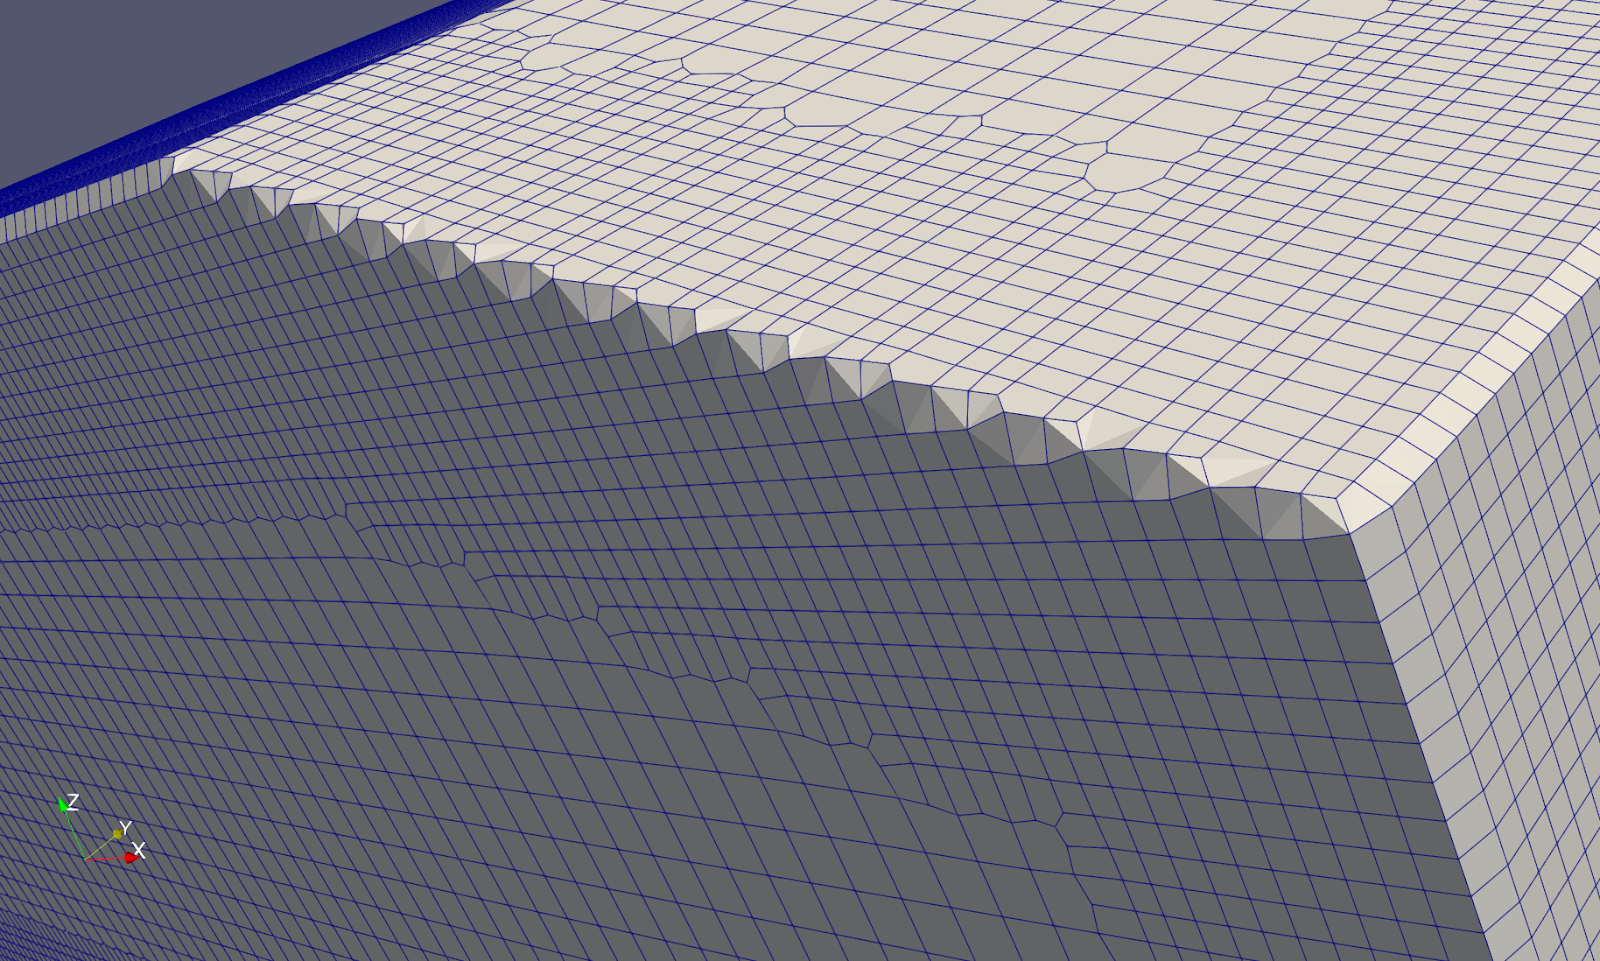
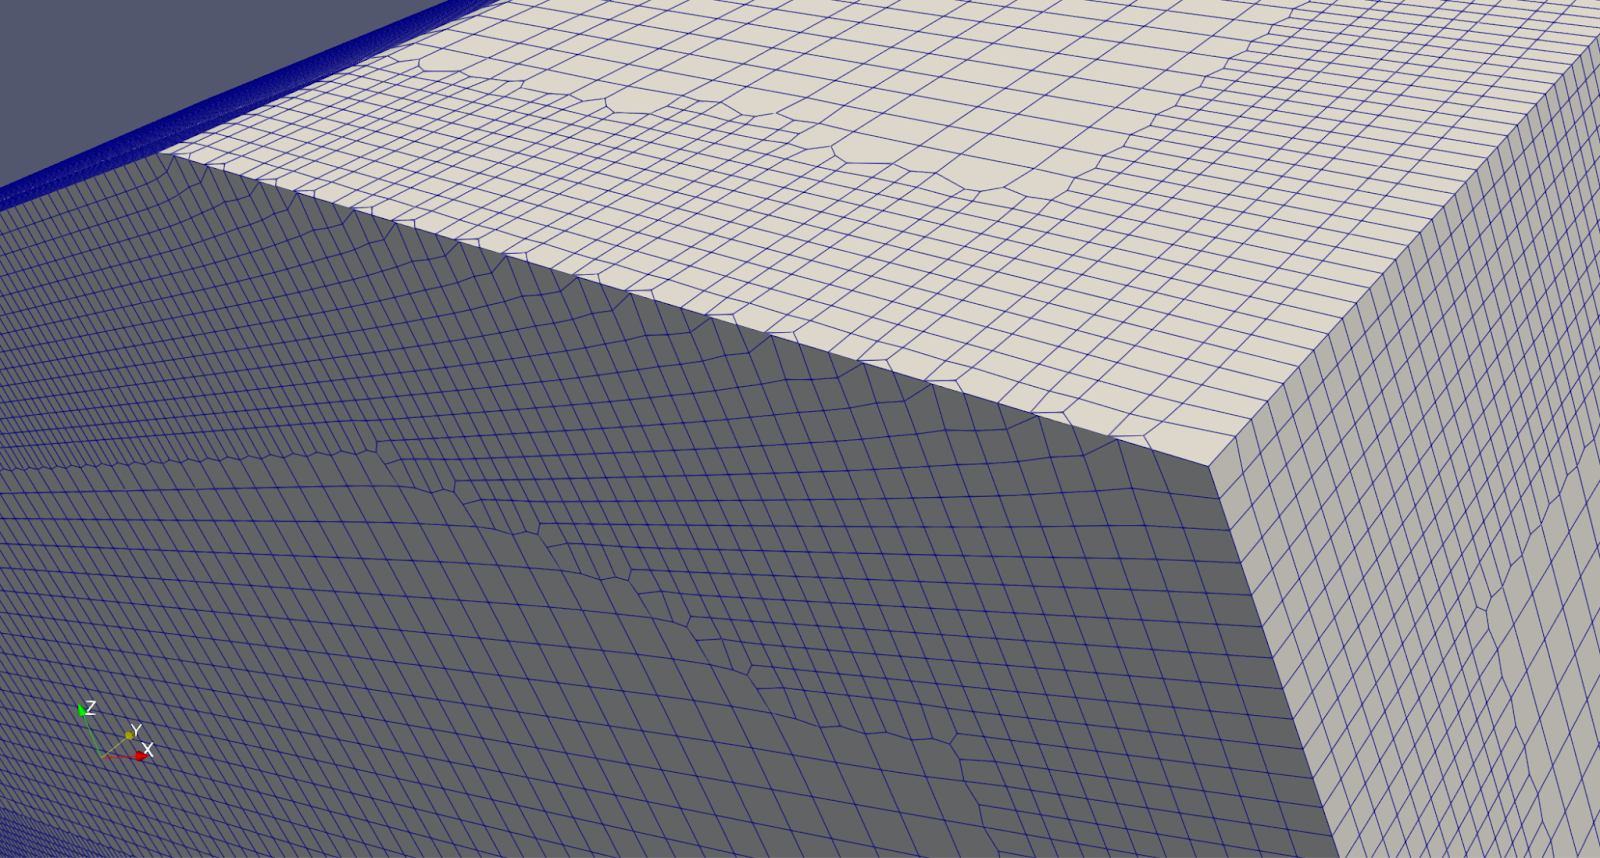
snappyHexMesh is weak against sharp edges due to its snapping nature of hexahedral cells toward STL surface. If your geometry has sharp edges, you will have rough edges in your mesh. While this cannot give 100% guarantee that all your edges are resolved, refining feature edges will result in significantly better and smoother meshes.
Tip 4 Set mesh quality loosely and stricten gradually

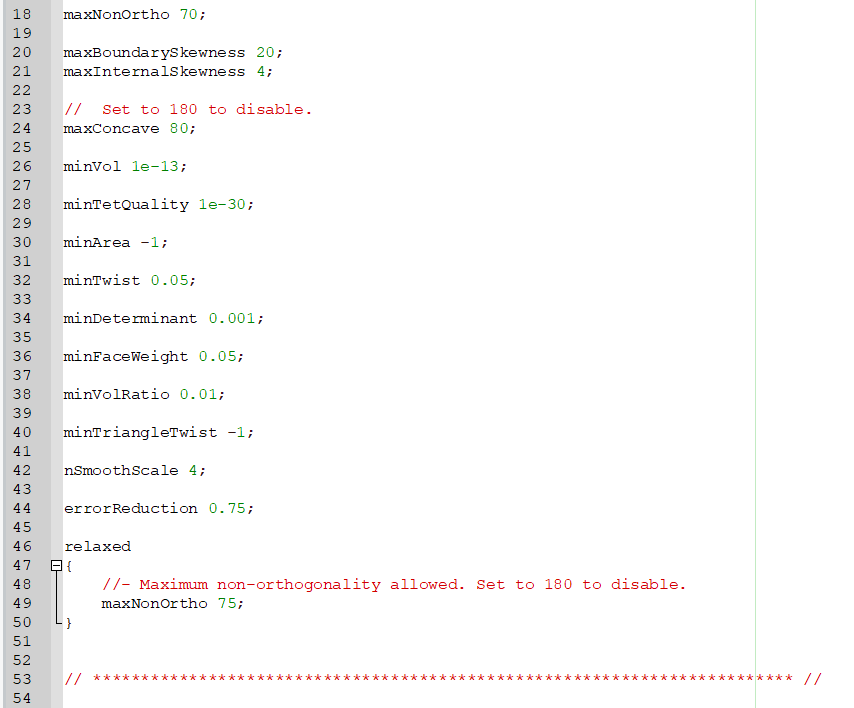
The target mesh quality settings inside meshQuality dictionary are very important guidelines to obtain a high quality mesh. However, these settings may give the opposite effect to your mesh, especially during the layer addition step.
Tip 5 Turn off “relativeSizes” if necessary
In layer addition settings, you can either turn on or off the relativeSizes flag. If turned on, snapyHexMesh will use the size of the nearest cell to the wall as a reference thickness for the boundary layer mesh. If turned off, it will use absolute values. So, when to turn on and when to turn off? If you define the surface refinement of your wall patch with a refinement range like (4 6), your cell size on your patch will be different. Consequently, the prism layer thickness will also be different if you turned on relativeThickness. On the other hand, you will get refinement independent prism layers throughout your whole body which is more desirable most of the time.
However, there is a catch. If you turn off relativeSizes, you need to calculate the layer thickness by yourself and input it as absolute values. If you miscalculated or mis-guessed, your boundary layer will have strange thicknesses or you will get very bad cells. So, you need to decide your parameters more carefully than when relativeSizes is on.
Bonus Tips
- Use surfaceOrient to make all normal vectors of your STL file outward
- If STL is too small, scale up by 100x or 1000x and generate the mesh. Then scale down the mesh.
- Use Boxes and Spheres to visualize the refinement regions applied inside snappyHexMeshDict.
- It is a good idea to keep 3 to 5 cells between each refinement. However, if your mesh contains very small gaps, you may stick with 1 cell between each refinement.
Summary
snappyHexMesh is a very powerful tool to generate OpenFOAM meshes and probably the best free tool available out there. For several users, the meshes generated by snappyHexMesh may be of low quality. However, by employing the tricks we explained here, you can significantly improve your mesh quality!
6 comments
This is helpful, thanks. One question is, how do you review your mesh, what software? I’m a beginner. Another question: how do you improve the STL surface?
Thank you for your interest! You can use Paraview to view your mesh and visually confirm it is good.
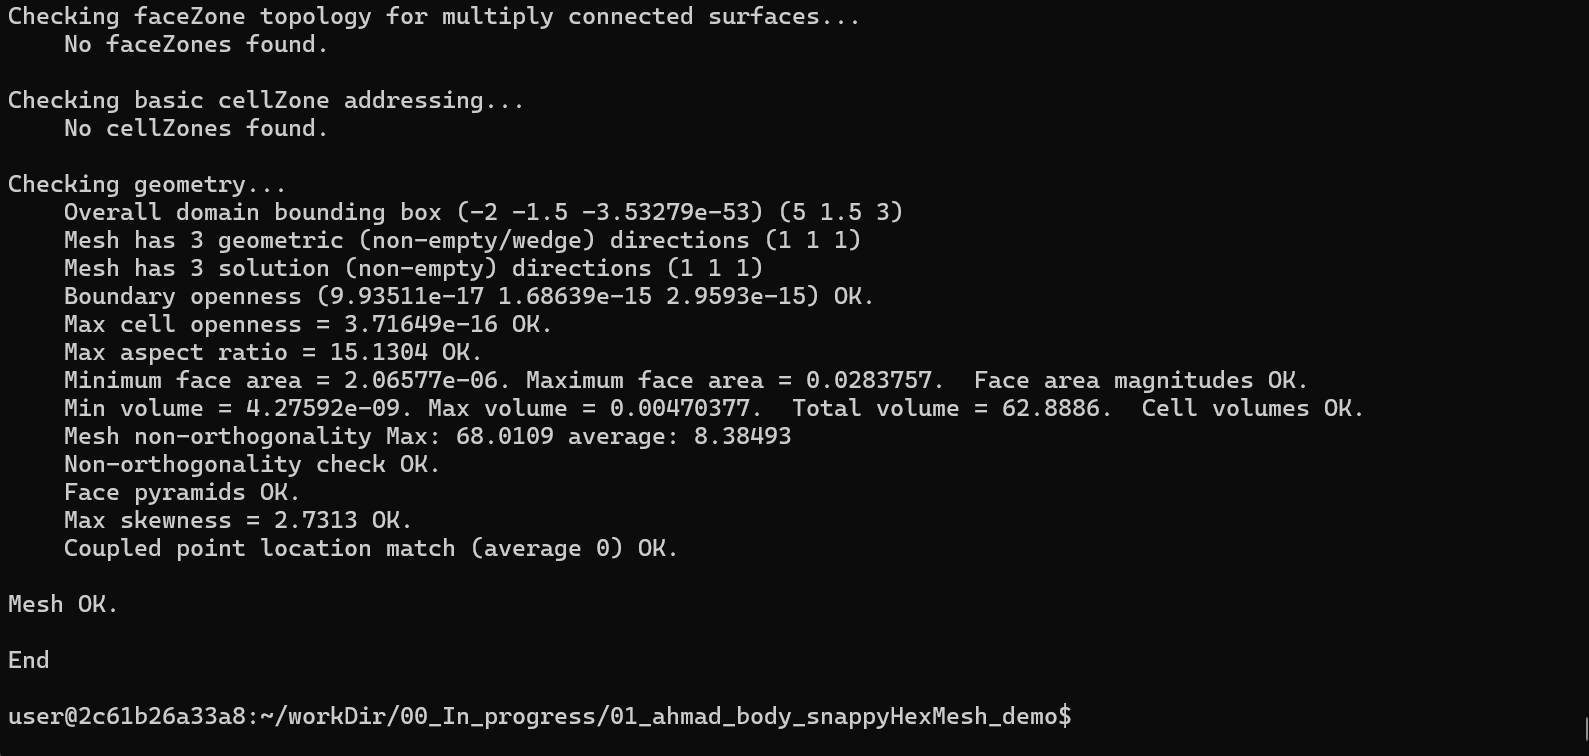
For quantative check, you can use checkMesh provided by OpenFOAM to make sure your generated mesh is good enough.
Thank you for your explanation.
You are welcome. And please stay in tune for more!
Hey There. I found your blog using msn. This is a really well written article. I will be sure to bookmark it and come back to read more of your useful info. Thanks for the post. I will certainly return.
Thank you so much for your kind words!
I am glad that my content is useful for you.
Please stay in tune for more information and tutorials.